12 Facts about the Battle of France
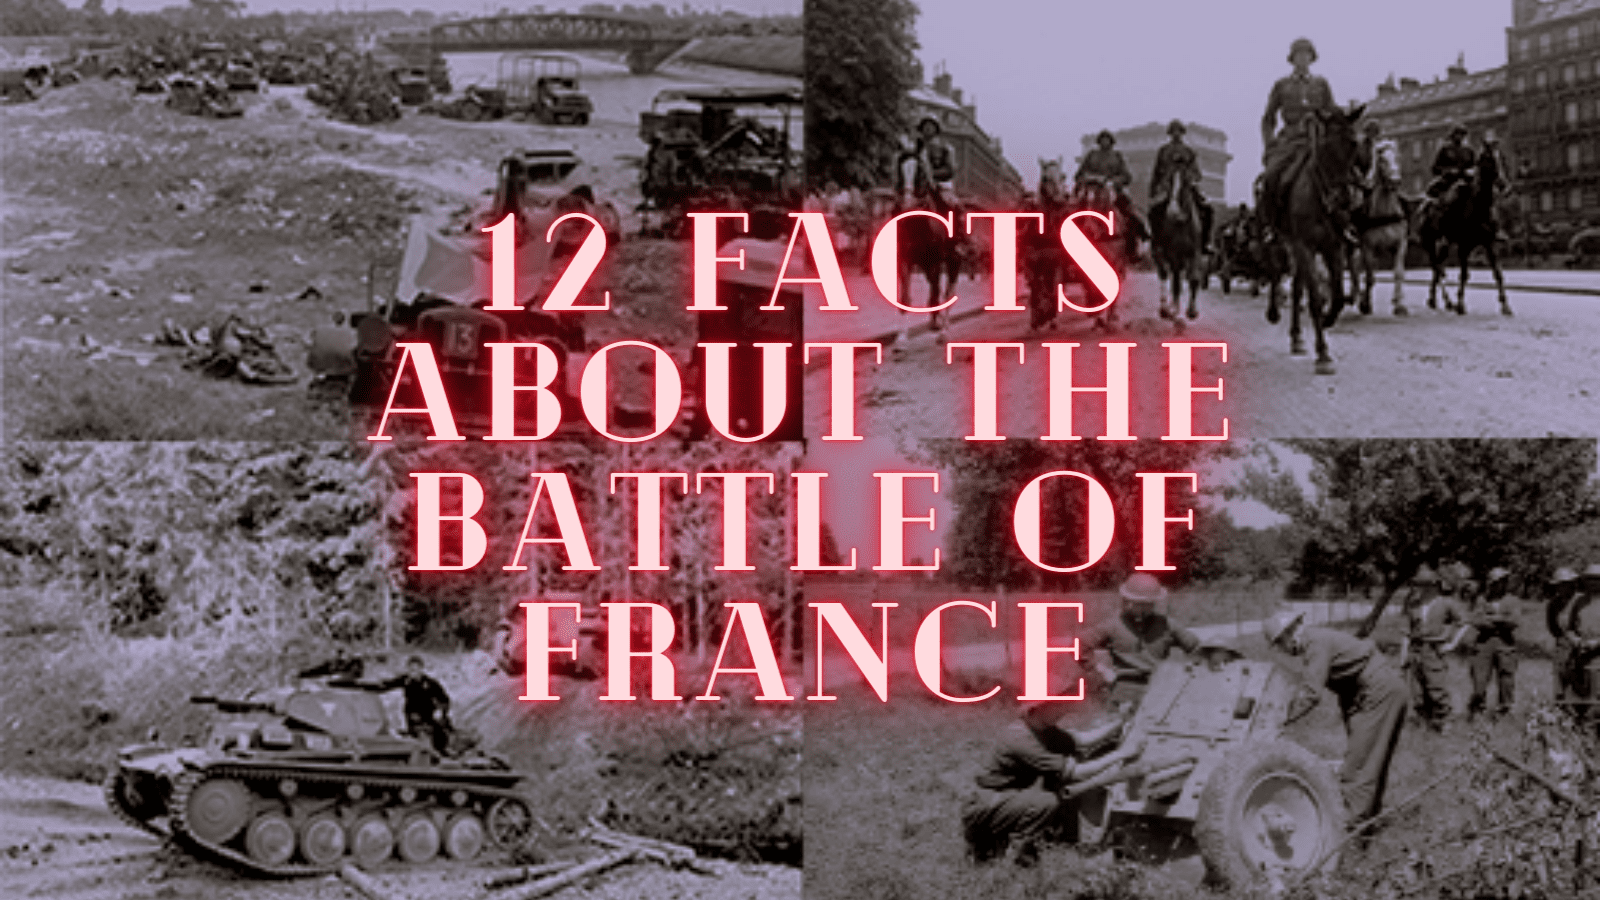
The Battle of France was one of the largest German victories in WWII. It encompasses the invasion of Belgium, Luxembourg, the Netherlands, and the eventual fall of France. Because it was an invasion of not just France, you will sometimes see it referred to as “The Western Campaign” instead. The campaign began on the 10th of May 1940 and concluded on the 25th of June of the same year. The fall of France effectively ended ally land operations on the Western front until the Normandy Landings in June of 1944.
[/et_pb_text][/et_pb_column][/et_pb_row][et_pb_row _builder_version=”4.15.0″ _module_preset=”default” global_colors_info=”{}”][et_pb_column type=”4_4″ _builder_version=”4.15.0″ _module_preset=”default” global_colors_info=”{}”][et_pb_text _builder_version=”4.15.0″ _module_preset=”default” global_colors_info=”{}”]1. Maginot Line
[/et_pb_text][/et_pb_column][/et_pb_row][et_pb_row _builder_version=”4.15.0″ _module_preset=”default” column_structure=”1_5,3_5,1_5″][et_pb_column _builder_version=”4.15.0″ _module_preset=”default” type=”1_5″][/et_pb_column][et_pb_column _builder_version=”4.15.0″ _module_preset=”default” type=”3_5″][et_pb_image src=”http://historywithhenry.com/wp-content/uploads/2022/05/1.png” _builder_version=”4.15.0″ _module_preset=”default” alt=”Battle of France” title_text=”1″ hover_enabled=”0″ sticky_enabled=”0″][/et_pb_image][/et_pb_column][et_pb_column _builder_version=”4.15.0″ _module_preset=”default” type=”1_5″][/et_pb_column][/et_pb_row][et_pb_row _builder_version=”4.15.0″ _module_preset=”default” global_colors_info=”{}”][et_pb_column type=”4_4″ _builder_version=”4.15.0″ _module_preset=”default” global_colors_info=”{}”][et_pb_text _builder_version=”4.15.0″ _module_preset=”default” global_colors_info=”{}”]The Maginot Line was a set of strong fortifications along the Franco-German border. Mostly of concrete, these fortifications were impervious to most contemporary attack strategies. The Maginot Line was intended to shunt any possible invasion up through Belgium, which would then allow the French to fight outside their territory (preventing the type of damage they saw in WWI). In this way, the Maginot Line did its job perfectly – Germany chose to invade from the North in order to circumvent these fortifications just as the French had hoped.
[/et_pb_text][/et_pb_column][/et_pb_row][et_pb_row _builder_version=”4.15.0″ _module_preset=”default” global_colors_info=”{}”][et_pb_column type=”4_4″ _builder_version=”4.15.0″ _module_preset=”default” global_colors_info=”{}”][et_pb_text _builder_version=”4.15.0″ _module_preset=”default” global_colors_info=”{}”]2. Case Yellow
[/et_pb_text][/et_pb_column][/et_pb_row][et_pb_row _builder_version=”4.15.0″ _module_preset=”default” column_structure=”1_5,3_5,1_5″][et_pb_column _builder_version=”4.15.0″ _module_preset=”default” type=”1_5″][/et_pb_column][et_pb_column _builder_version=”4.15.0″ _module_preset=”default” type=”3_5″][et_pb_image src=”http://historywithhenry.com/wp-content/uploads/2022/05/2.png” _builder_version=”4.15.0″ _module_preset=”default” alt=”Battle of France” title_text=”2″ hover_enabled=”0″ sticky_enabled=”0″][/et_pb_image][/et_pb_column][et_pb_column _builder_version=”4.15.0″ _module_preset=”default” type=”1_5″][/et_pb_column][/et_pb_row][et_pb_row _builder_version=”4.15.0″ _module_preset=”default” global_colors_info=”{}”][et_pb_column type=”4_4″ _builder_version=”4.15.0″ _module_preset=”default” global_colors_info=”{}”][et_pb_text _builder_version=”4.15.0″ _module_preset=”default” custom_padding=”0px|||||” global_colors_info=”{}”]Case Yellow was the codename given to the initial invasion of the Low Countries North of France. The mastermind of the plan, Franz Halder, originally did not have any plans to immediately attack France. While the invasion of Luxembourg, Belgium, and the Netherlands were to be swift and surprising, he thought the French Army to be too strong and well trained to overwhelm like they had Poland. However, Hitler was determined to use surprise to their full advantage. He pushed for an armored breakthrough, and control of the Northern border. When they had control of the border, the possibility of immediate invasion was implied, but not a forgone conclusion.
[/et_pb_text][/et_pb_column][/et_pb_row][et_pb_row _builder_version=”4.15.0″ _module_preset=”default” global_colors_info=”{}”][et_pb_column type=”4_4″ _builder_version=”4.15.0″ _module_preset=”default” global_colors_info=”{}”][et_pb_text _builder_version=”4.15.0″ _module_preset=”default” global_colors_info=”{}”]3. Manstein Plan
[/et_pb_text][/et_pb_column][/et_pb_row][et_pb_row _builder_version=”4.15.0″ _module_preset=”default” column_structure=”1_5,3_5,1_5″][et_pb_column _builder_version=”4.15.0″ _module_preset=”default” type=”1_5″][/et_pb_column][et_pb_column _builder_version=”4.15.0″ _module_preset=”default” type=”3_5″][et_pb_image src=”http://historywithhenry.com/wp-content/uploads/2022/05/3.png” _builder_version=”4.15.0″ _module_preset=”default” alt=”Battle of France” title_text=”3″ hover_enabled=”0″ sticky_enabled=”0″][/et_pb_image][/et_pb_column][et_pb_column _builder_version=”4.15.0″ _module_preset=”default” type=”1_5″][/et_pb_column][/et_pb_row][et_pb_row _builder_version=”4.15.0″ _module_preset=”default” global_colors_info=”{}”][et_pb_column type=”4_4″ _builder_version=”4.15.0″ _module_preset=”default” global_colors_info=”{}”][et_pb_text _builder_version=”4.15.0″ _module_preset=”default” global_colors_info=”{}”]The Manstein Plan was a strategy by Lieutenant-General Erich von Manstein who also disagreed with Halder’s invasion strategy. It called for concentrated use of armored vehicles in Sedan moving toward the English Channel without waiting for infantry support. The outcome of this strategy could be a decisive victory even though such a plan also carried high risk. Halder and the larger OKH disliked the plan and attempted to silence Manstein, but through luck, Hitler learned of the Manstein Plan. Rather than being risk-averse, Hitler was heavily in favor of this strategy and ordered that this line of thinking be adopted immediately.
[/et_pb_text][/et_pb_column][/et_pb_row][et_pb_row _builder_version=”4.15.0″ _module_preset=”default” global_colors_info=”{}”][et_pb_column type=”4_4″ _builder_version=”4.15.0″ _module_preset=”default” global_colors_info=”{}”][et_pb_text _builder_version=”4.15.0″ _module_preset=”default” global_colors_info=”{}”]4. Danzig – The surprise Attack
[/et_pb_text][/et_pb_column][/et_pb_row][et_pb_row _builder_version=”4.15.0″ _module_preset=”default” column_structure=”1_5,3_5,1_5″][et_pb_column _builder_version=”4.15.0″ _module_preset=”default” type=”1_5″][/et_pb_column][et_pb_column _builder_version=”4.15.0″ _module_preset=”default” type=”3_5″][et_pb_image src=”http://historywithhenry.com/wp-content/uploads/2022/05/4.jpg” _builder_version=”4.15.0″ _module_preset=”default” alt=”Battle of France” title_text=”4″ hover_enabled=”0″ sticky_enabled=”0″][/et_pb_image][/et_pb_column][et_pb_column _builder_version=”4.15.0″ _module_preset=”default” type=”1_5″][/et_pb_column][/et_pb_row][et_pb_row _builder_version=”4.15.0″ _module_preset=”default” global_colors_info=”{}”][et_pb_column type=”4_4″ _builder_version=”4.15.0″ _module_preset=”default” global_colors_info=”{}”][et_pb_text _builder_version=”4.15.0″ _module_preset=”default” global_colors_info=”{}”]On the 9th of May, the order went out to begin Fall Gelb. German forces took Luxembourg with only light resistance, and the nighttime invasion of Belgium and the Netherlands began immediately. Surprise landing at the Hague among other places set into motion the French defense, which dispatched their best soldiers to prevent the occupation of the Netherlands. However, the German advancement was so swift that by the time The French Seventh Army arrived, they were cut off and fighting was all but over. With low fuel reserves, they were forced to retreat toward Belgium, where the Germans had been marginally less successful.
[/et_pb_text][/et_pb_column][/et_pb_row][et_pb_row _builder_version=”4.15.0″ _module_preset=”default” global_colors_info=”{}”][et_pb_column type=”4_4″ _builder_version=”4.15.0″ _module_preset=”default” global_colors_info=”{}”][et_pb_text _builder_version=”4.15.0″ _module_preset=”default” global_colors_info=”{}”]5. Ardennes
[/et_pb_text][/et_pb_column][/et_pb_row][et_pb_row _builder_version=”4.15.0″ _module_preset=”default” column_structure=”1_5,3_5,1_5″][et_pb_column _builder_version=”4.15.0″ _module_preset=”default” type=”1_5″][/et_pb_column][et_pb_column _builder_version=”4.15.0″ _module_preset=”default” type=”3_5″][et_pb_image src=”http://historywithhenry.com/wp-content/uploads/2022/05/5.jpg” _builder_version=”4.15.0″ _module_preset=”default” alt=”Battle of France” title_text=”5″ hover_enabled=”0″ sticky_enabled=”0″][/et_pb_image][/et_pb_column][et_pb_column _builder_version=”4.15.0″ _module_preset=”default” type=”1_5″][/et_pb_column][/et_pb_row][et_pb_row _builder_version=”4.15.0″ _module_preset=”default” global_colors_info=”{}”][et_pb_column type=”4_4″ _builder_version=”4.15.0″ _module_preset=”default” global_colors_info=”{}”][et_pb_text _builder_version=”4.15.0″ _module_preset=”default” global_colors_info=”{}”]Having reacted to what they thought was the main German offensive with their best men, the French Army still along the Northern border was at a disadvantage. Not only were they disorganized moving around to adjust for the missing Seventh Army, but they were also less trained. At this point, the German Central offensive – the actual main offense – was launched through the Ardennes. While Belgian and French soldiers blocked roads and attempted to slow the advance, they couldn’t defend their barricades and German engineers simply dismantled them. Eventually, French forces retreated behind the Meuse.
[/et_pb_text][/et_pb_column][/et_pb_row][et_pb_row _builder_version=”4.15.0″ _module_preset=”default” global_colors_info=”{}”][et_pb_column type=”4_4″ _builder_version=”4.15.0″ _module_preset=”default” global_colors_info=”{}”][et_pb_text _builder_version=”4.15.0″ _module_preset=”default” global_colors_info=”{}”]6. The collapse of the French army
[/et_pb_text][/et_pb_column][/et_pb_row][et_pb_row _builder_version=”4.15.0″ _module_preset=”default” column_structure=”1_5,3_5,1_5″][et_pb_column _builder_version=”4.15.0″ _module_preset=”default” type=”1_5″][/et_pb_column][et_pb_column _builder_version=”4.15.0″ _module_preset=”default” type=”3_5″][et_pb_image src=”http://historywithhenry.com/wp-content/uploads/2022/05/6.png” _builder_version=”4.15.0″ _module_preset=”default” alt=”Battle of France” title_text=”6″ hover_enabled=”0″ sticky_enabled=”0″][/et_pb_image][/et_pb_column][et_pb_column _builder_version=”4.15.0″ _module_preset=”default” type=”1_5″][/et_pb_column][/et_pb_row][et_pb_row _builder_version=”4.15.0″ _module_preset=”default” global_colors_info=”{}”][et_pb_column type=”4_4″ _builder_version=”4.15.0″ _module_preset=”default” global_colors_info=”{}”][et_pb_text _builder_version=”4.15.0″ _module_preset=”default” global_colors_info=”{}”]Generals on the Central Front received orders to await a new French line of defense before continuing, however, they largely ignored this order on the ground. Guderian, a pivotal officer on the ground, threatened to resign over the halt order and continued to advance. The result was that while German units were outnumbered, their speed allowed them to close with French armored units and dismantle them while the French remained confused. The advance only ended when the fuel ran out, and the German army had effectively collapsed the French defense with negligible losses.
[/et_pb_text][/et_pb_column][/et_pb_row][et_pb_row _builder_version=”4.15.0″ _module_preset=”default” global_colors_info=”{}”][et_pb_column type=”4_4″ _builder_version=”4.15.0″ _module_preset=”default” global_colors_info=”{}”][et_pb_text _builder_version=”4.15.0″ _module_preset=”default” global_colors_info=”{}”]7. The retreat of the British Expeditionary Force
[/et_pb_text][/et_pb_column][/et_pb_row][et_pb_row _builder_version=”4.15.0″ _module_preset=”default” column_structure=”1_5,3_5,1_5″][et_pb_column _builder_version=”4.15.0″ _module_preset=”default” type=”1_5″][/et_pb_column][et_pb_column _builder_version=”4.15.0″ _module_preset=”default” type=”3_5″][et_pb_image src=”http://historywithhenry.com/wp-content/uploads/2022/05/7.jpg” _builder_version=”4.15.0″ _module_preset=”default” alt=”Battle of France” title_text=”7″ hover_enabled=”0″ sticky_enabled=”0″][/et_pb_image][/et_pb_column][et_pb_column _builder_version=”4.15.0″ _module_preset=”default” type=”1_5″][/et_pb_column][/et_pb_row][et_pb_row _builder_version=”4.15.0″ _module_preset=”default” global_colors_info=”{}”][et_pb_column type=”4_4″ _builder_version=”4.15.0″ _module_preset=”default” global_colors_info=”{}”][et_pb_text _builder_version=”4.15.0″ _module_preset=”default” global_colors_info=”{}”]General Edmund Ironside and General Lord Gort were left with the unenviable task of overseeing the British Expeditionary Forces when the French Army collapsed. At first, Ironside attempted to convince Gort of attacking Southwest toward Amiens but learned that Gort had most of his units tied up on the Scheldt River on orders from a French General who had not made contact in eight days. Bewildered, he approached the General in question, General Billotte, and discovered him incapable of taking any action. Ironside at this point left France, reporting that he thought the BEF to be lost.
After German forces took Amiens, the situation got dire, as French and British soldiers were cut off from their supplies. In reaction, the 1st Allied Army (containing British, French, and Belgian forces) banded together in a pocket and made a mad dash for the English Channel.
[/et_pb_text][/et_pb_column][/et_pb_row][et_pb_row _builder_version=”4.15.0″ _module_preset=”default” global_colors_info=”{}”][et_pb_column type=”4_4″ _builder_version=”4.15.0″ _module_preset=”default” global_colors_info=”{}”][et_pb_text _builder_version=”4.15.0″ _module_preset=”default” global_colors_info=”{}”]8. The Siege Of Calais
[/et_pb_text][/et_pb_column][/et_pb_row][et_pb_row _builder_version=”4.15.0″ _module_preset=”default” column_structure=”1_5,3_5,1_5″][et_pb_column _builder_version=”4.15.0″ _module_preset=”default” type=”1_5″][/et_pb_column][et_pb_column _builder_version=”4.15.0″ _module_preset=”default” type=”3_5″][et_pb_image src=”http://historywithhenry.com/wp-content/uploads/2022/05/8.jpg” _builder_version=”4.15.0″ _module_preset=”default” alt=”Battle of France” title_text=”8″ hover_enabled=”0″ sticky_enabled=”0″][/et_pb_image][/et_pb_column][et_pb_column _builder_version=”4.15.0″ _module_preset=”default” type=”1_5″][/et_pb_column][/et_pb_row][et_pb_row _builder_version=”4.15.0″ _module_preset=”default” global_colors_info=”{}”][et_pb_column type=”4_4″ _builder_version=”4.15.0″ _module_preset=”default” global_colors_info=”{}”][et_pb_text _builder_version=”4.15.0″ _module_preset=”default” global_colors_info=”{}”]Gort by this time was doubtful that the French would succeed, and despite orders to attempt to hold a pocket on the coast, he instead began a delaying tactic. Allied forces held Calais as long as they could, tying up German forces that would otherwise be attacking Dunkirk (the Allied evacuation point). They held the city for three days, and the docks for an additional day after that. Although this delay allowed for a successful evacuation of personnel to Britain, it came at a high cost. The group at Calais suffered a 60% casualty rate.
[/et_pb_text][/et_pb_column][/et_pb_row][et_pb_row _builder_version=”4.15.0″ _module_preset=”default” global_colors_info=”{}”][et_pb_column type=”4_4″ _builder_version=”4.15.0″ _module_preset=”default” global_colors_info=”{}”][et_pb_text _builder_version=”4.15.0″ _module_preset=”default” global_colors_info=”{}”]9. Operation Dynamo – Dunkirk
[/et_pb_text][/et_pb_column][/et_pb_row][et_pb_row _builder_version=”4.15.0″ _module_preset=”default” column_structure=”1_5,3_5,1_5″][et_pb_column _builder_version=”4.15.0″ _module_preset=”default” type=”1_5″][/et_pb_column][et_pb_column _builder_version=”4.15.0″ _module_preset=”default” type=”3_5″][et_pb_image src=”http://historywithhenry.com/wp-content/uploads/2022/05/9.png” _builder_version=”4.15.0″ _module_preset=”default” alt=”Battle of France” title_text=”9″ hover_enabled=”0″ sticky_enabled=”0″][/et_pb_image][/et_pb_column][et_pb_column _builder_version=”4.15.0″ _module_preset=”default” type=”1_5″][/et_pb_column][/et_pb_row][et_pb_row _builder_version=”4.15.0″ _module_preset=”default” global_colors_info=”{}”][et_pb_column type=”4_4″ _builder_version=”4.15.0″ _module_preset=”default” global_colors_info=”{}”][et_pb_text _builder_version=”4.15.0″ _module_preset=”default” global_colors_info=”{}”]To make the best of the delay at Calais, Operation Dynamo – the code name for the evacuation – was launched at Dunkirk. A total of 165,000 troops were evacuated by May 31st, an estimated 70,000 of which would have been stranded without the bravery of soldiers at Calais. To make the operation as quick as possible, a large variety of private watercraft were used in the evacuation. These included everything from ferries to speedboats to pleasure craft. Called in records the “Little Boats” these unusual military units made up the bulk of the evacuation force.
[/et_pb_text][/et_pb_column][/et_pb_row][et_pb_row _builder_version=”4.15.0″ _module_preset=”default” global_colors_info=”{}”][et_pb_column type=”4_4″ _builder_version=”4.15.0″ _module_preset=”default” global_colors_info=”{}”][et_pb_text _builder_version=”4.15.0″ _module_preset=”default” global_colors_info=”{}”]10. The German 2nd Offensive
[/et_pb_text][/et_pb_column][/et_pb_row][et_pb_row _builder_version=”4.15.0″ _module_preset=”default” column_structure=”1_5,3_5,1_5″][et_pb_column _builder_version=”4.15.0″ _module_preset=”default” type=”1_5″][/et_pb_column][et_pb_column _builder_version=”4.15.0″ _module_preset=”default” type=”3_5″][et_pb_image src=”http://historywithhenry.com/wp-content/uploads/2022/05/10.jpg” _builder_version=”4.15.0″ _module_preset=”default” alt=”Battle of France” title_text=”10″ hover_enabled=”0″ sticky_enabled=”0″][/et_pb_image][/et_pb_column][et_pb_column _builder_version=”4.15.0″ _module_preset=”default” type=”1_5″][/et_pb_column][/et_pb_row][et_pb_row _builder_version=”4.15.0″ _module_preset=”default” global_colors_info=”{}”][et_pb_column type=”4_4″ _builder_version=”4.15.0″ _module_preset=”default” global_colors_info=”{}”][et_pb_text _builder_version=”4.15.0″ _module_preset=”default” global_colors_info=”{}”]Beginning on the 5th of June 1940, German soldiers advanced toward the Seine River. Unlike the initial advance, the German Army encountered more resistance during its second offensive. The French Army had been rejuvenated by its supply lines and undergone repairs from the nearby repair shops. The morale of the Army was better than it had been with the new commander, although it was still shaky. Despite best efforts by the French Army, resistance was all they succeeded in the offering. Deprived of their best soldiers in the encirclement to the North, and with a large front to protect, the French army was slowly pushed back.
Operation Tiger finally cracked the Maginot Line, which was launched on the 15th of June. Most French fortresses had surrendered by June 25th, however a few continued to fight. The last fortress to surrender was Simserhof on the 10th of July 1940.
[/et_pb_text][/et_pb_column][/et_pb_row][et_pb_row _builder_version=”4.15.0″ _module_preset=”default” global_colors_info=”{}”][et_pb_column type=”4_4″ _builder_version=”4.15.0″ _module_preset=”default” global_colors_info=”{}”][et_pb_text _builder_version=”4.15.0″ _module_preset=”default” global_colors_info=”{}”]11. The French Surrender
[/et_pb_text][/et_pb_column][/et_pb_row][et_pb_row _builder_version=”4.15.0″ _module_preset=”default” column_structure=”1_5,3_5,1_5″][et_pb_column _builder_version=”4.15.0″ _module_preset=”default” type=”1_5″][/et_pb_column][et_pb_column _builder_version=”4.15.0″ _module_preset=”default” type=”3_5″][et_pb_image src=”http://historywithhenry.com/wp-content/uploads/2022/05/11.jpg” _builder_version=”4.15.0″ _module_preset=”default” alt=”Battle of France” title_text=”11″ hover_enabled=”0″ sticky_enabled=”0″][/et_pb_image][/et_pb_column][et_pb_column _builder_version=”4.15.0″ _module_preset=”default” type=”1_5″][/et_pb_column][/et_pb_row][et_pb_row _builder_version=”4.15.0″ _module_preset=”default” global_colors_info=”{}”][et_pb_column type=”4_4″ _builder_version=”4.15.0″ _module_preset=”default” global_colors_info=”{}”][et_pb_text _builder_version=”4.15.0″ _module_preset=”default” global_colors_info=”{}”]The armistice between France and Germany was signed on the 22nd of June 1940 near Compiegne, France in the same rail car in which the countries had signed the 1918 WWI armistice. Hitler chose this location as a moment of supreme revenge against France, knowing that this time Germany had come out on top.
Germany had many reasons to sign such an armistice – they wanted to stop fighting in French North Africa and take France’s navy out of the equation. The armistice also allowed for German occupation of 3/5ths of France, at France’s expense. This would house all the military units that Hitler needed to eventually launch his full-scale land assault on the British.
[/et_pb_text][/et_pb_column][/et_pb_row][et_pb_row _builder_version=”4.15.0″ _module_preset=”default” global_colors_info=”{}”][et_pb_column type=”4_4″ _builder_version=”4.15.0″ _module_preset=”default” global_colors_info=”{}”][et_pb_text _builder_version=”4.15.0″ _module_preset=”default” global_colors_info=”{}”]12. Hitler’s Paris Victory Parade
[/et_pb_text][/et_pb_column][/et_pb_row][et_pb_row _builder_version=”4.15.0″ _module_preset=”default” column_structure=”1_5,3_5,1_5″][et_pb_column _builder_version=”4.15.0″ _module_preset=”default” type=”1_5″][/et_pb_column][et_pb_column _builder_version=”4.15.0″ _module_preset=”default” type=”3_5″][et_pb_image src=”http://historywithhenry.com/wp-content/uploads/2022/05/12.png” _builder_version=”4.15.0″ _module_preset=”default” alt=”Battle of France” title_text=”12″ hover_enabled=”0″ sticky_enabled=”0″][/et_pb_image][/et_pb_column][et_pb_column _builder_version=”4.15.0″ _module_preset=”default” type=”1_5″][/et_pb_column][/et_pb_row][et_pb_row _builder_version=”4.15.0″ _module_preset=”default” global_colors_info=”{}”][et_pb_column type=”4_4″ _builder_version=”4.15.0″ _module_preset=”default” global_colors_info=”{}”][et_pb_text _builder_version=”4.15.0″ _module_preset=”default” global_colors_info=”{}”]To celebrate their victory over France, Hitler organized a victory parade through the streets of Paris in June of 1940. This event is depicted in some of the most famous photographs of the decade, with German Leadership flanked by Nazi soldiers in front of landmarks like the Eiffel Tower. Hitler was reportedly so impressed with the city that he was moved to rebury Napoleon’s son next to him there and commissioned the designing of new public buildings in Berlin to rival Paris.
[/et_pb_text][/et_pb_column][/et_pb_row][/et_pb_section]


